Class Registration Tips and Tricks
(Updated July 2022)
I) Basic Search:
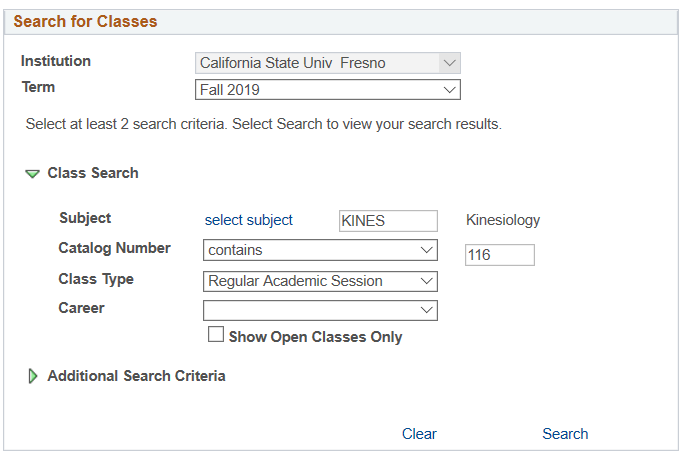
- Confirm the correct semester is selected in the “Term” section.
- To search a general subject area (e.g. Kinesiology), click “select subject” to search
subjects alphabetically, or type the abbreviation into the “Subject” box. Click search
to see all available courses within the subject.
- To search for a specific course, add the course subject and add the course number into the “Catalog Number” box.
- By default only open courses will be shown when searching. Uncheck the “Show Open Classes Only” box to search courses that are wait listed or completely closed.
II) Advanced Search:
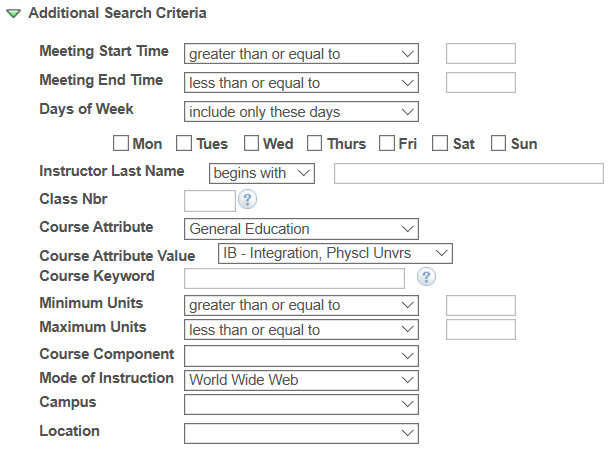
- Click on the green arrow next to “Additional Search Criteria” to refine courses by start time, days of the week, or other categories.
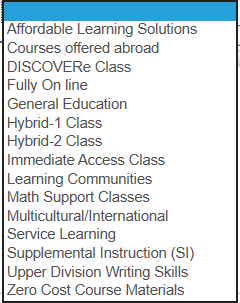
- Use “Course Attribute” to search by a variety of different categories:
- Select “General Education” to search exclusively GE courses. Use “Course Attribute Value” to search by specific GE areas. (Note: MI is NOT here)
- Select “Multicultural/International” to search all courses under the MI Additional Degree Requirement
- Select “Upper Division Writing Skills” to search all “W” courses that fulfill the writing requirement.
- To search for exclusively online courses (which appear as “Digital Campus”), select “Digital Campus” in the “Location” tab.
III) Selecting a Course:
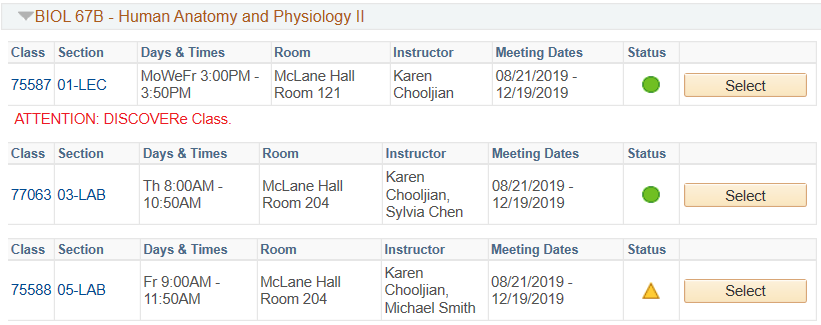

- When searching courses, click under “section” to see course information, including
total enrollment, pre-requisites, and the course description.
- Courses that are “DISCOVERe” have require a tablet or other technology
- Courses that are “Immediate Access” will send you digital copies of course materials before classes start.
- Note: Always select “Wait list if class is full” when adding a course to your shopping cart in case the course fills while you are enrolling.
Class Registration – Editing Your Schedule
I) Dropping a Class:
Use For: Removing a class from your schedule that you do not want to immediately replace
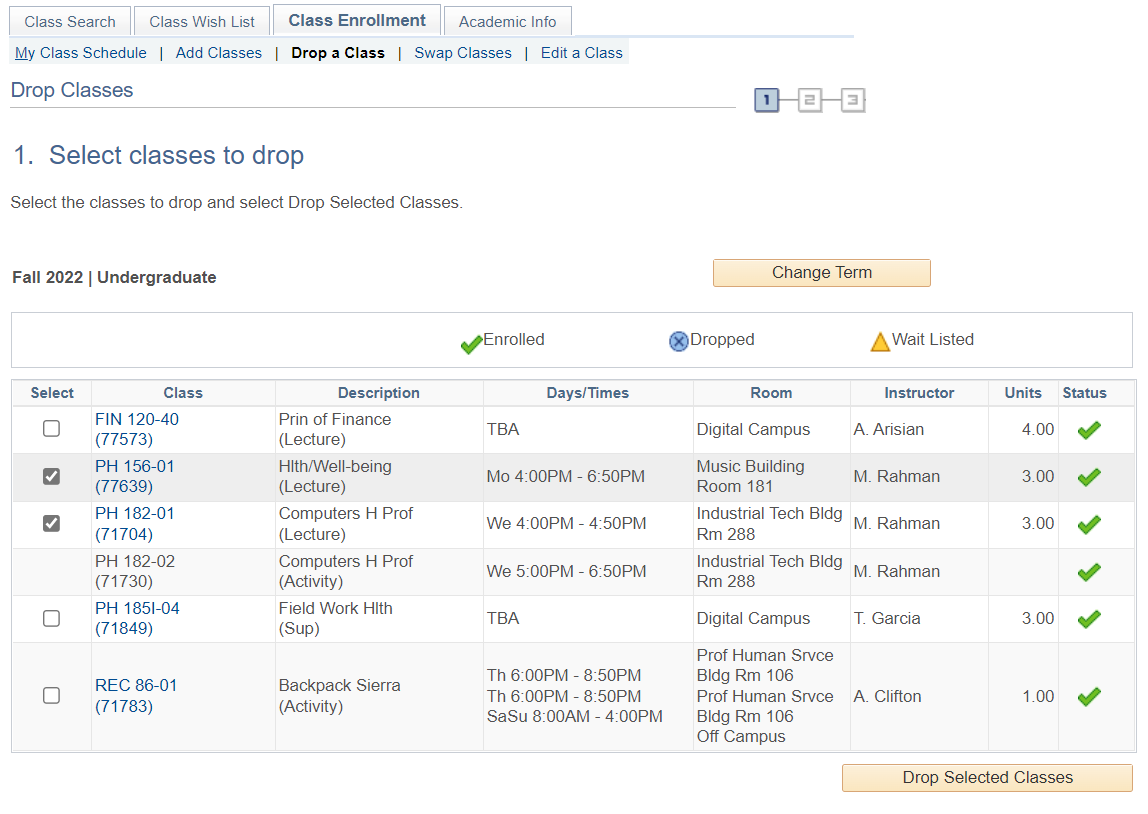
- Start by opening your student portal. Select the green arrow next to “My Academic Records & Registration,” then select “class enrollment.” Next, select “Drop a Class” from under class enrollment. (Alternatively, from your wish list select “class enrollment” from the top bar).
- Next, check the box in the “select” column of all courses that you want to drop
- Once you have selected the correct course(s), click “Drop Selected Classes” and then confirm the drop on the next page. Be sure to confirm the course is correct as you may not be able to get your spot back if the class is closed!
II) Swapping a Class:
Use For: Replacing a class from your schedule with another course from your wishlist. Swapping is useful, as it will not drop you from your enrolled course until the new class added, so if there’s an issue you still have your old course
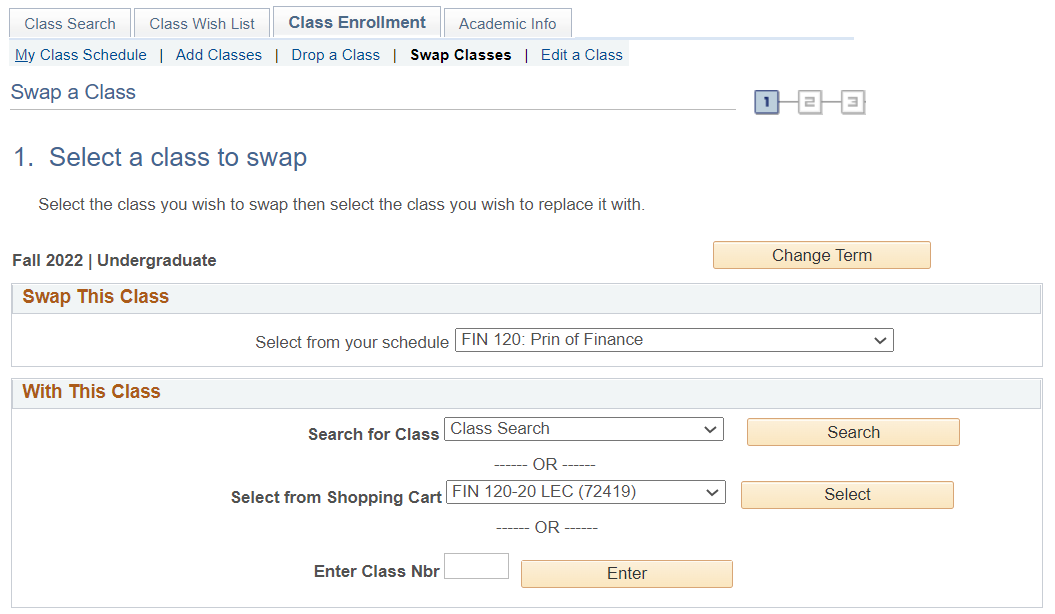
- Start by opening your student portal. Select the green arrow next to “My Academic Records & Registration,” then select “class enrollment.” Next, select “Swap a Class” from under class enrollment. (Alternatively, from your wish list select “class enrollment” from the top bar).
- Next, select the class you want to drop in the box titled “Select from your schedule.”
- In the box labeled “Select from Shopping Cart,” select the class you want to add and replace the dropped course with. Next, hit the “select” button next to the course and this will prompt you to confirm. If there are no issues, you will be dropped from the old class and added into the new course you want.
III) Editing a Class:
Use For: Changing a lab/activity section for a course without dropping the main lecture section.
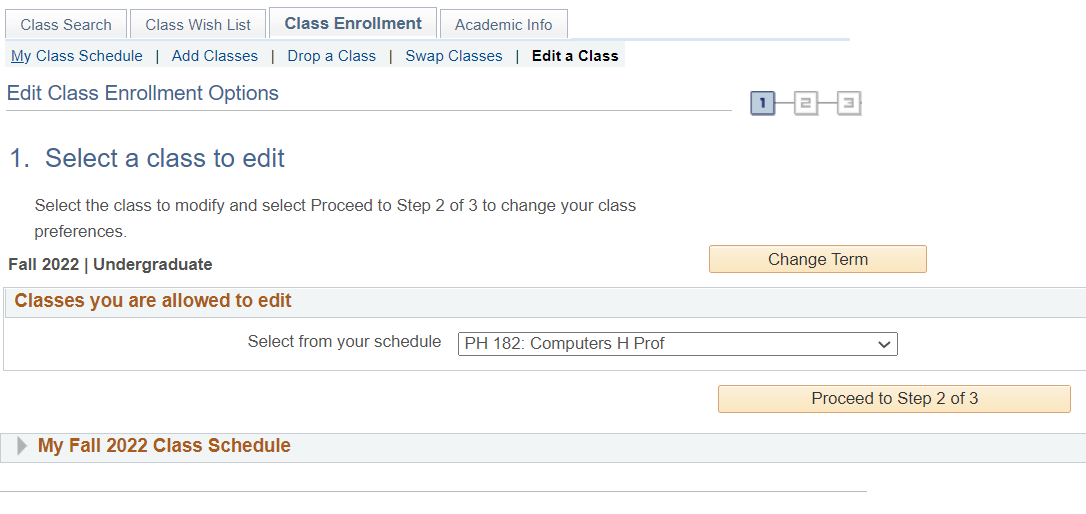
- Start by opening your student portal. Select the green arrow next to “My Academic Records & Registration,” then select “class enrollment.” Next, select “Edit a Class” from under class enrollment.
- Next, select the class you want to change your lab/activity time for. Select the “Proceed to Step 2 of 3” box and this will prompt you to select a lab/activity section again, which you can enroll into without dropping the course.
This HTML version was generated with AI assistance and may contain errors or omissions. The original approved PDF remains the official document of record. An alternative accessible format is available upon request from the document creator in accordance with Title II of the ADA.